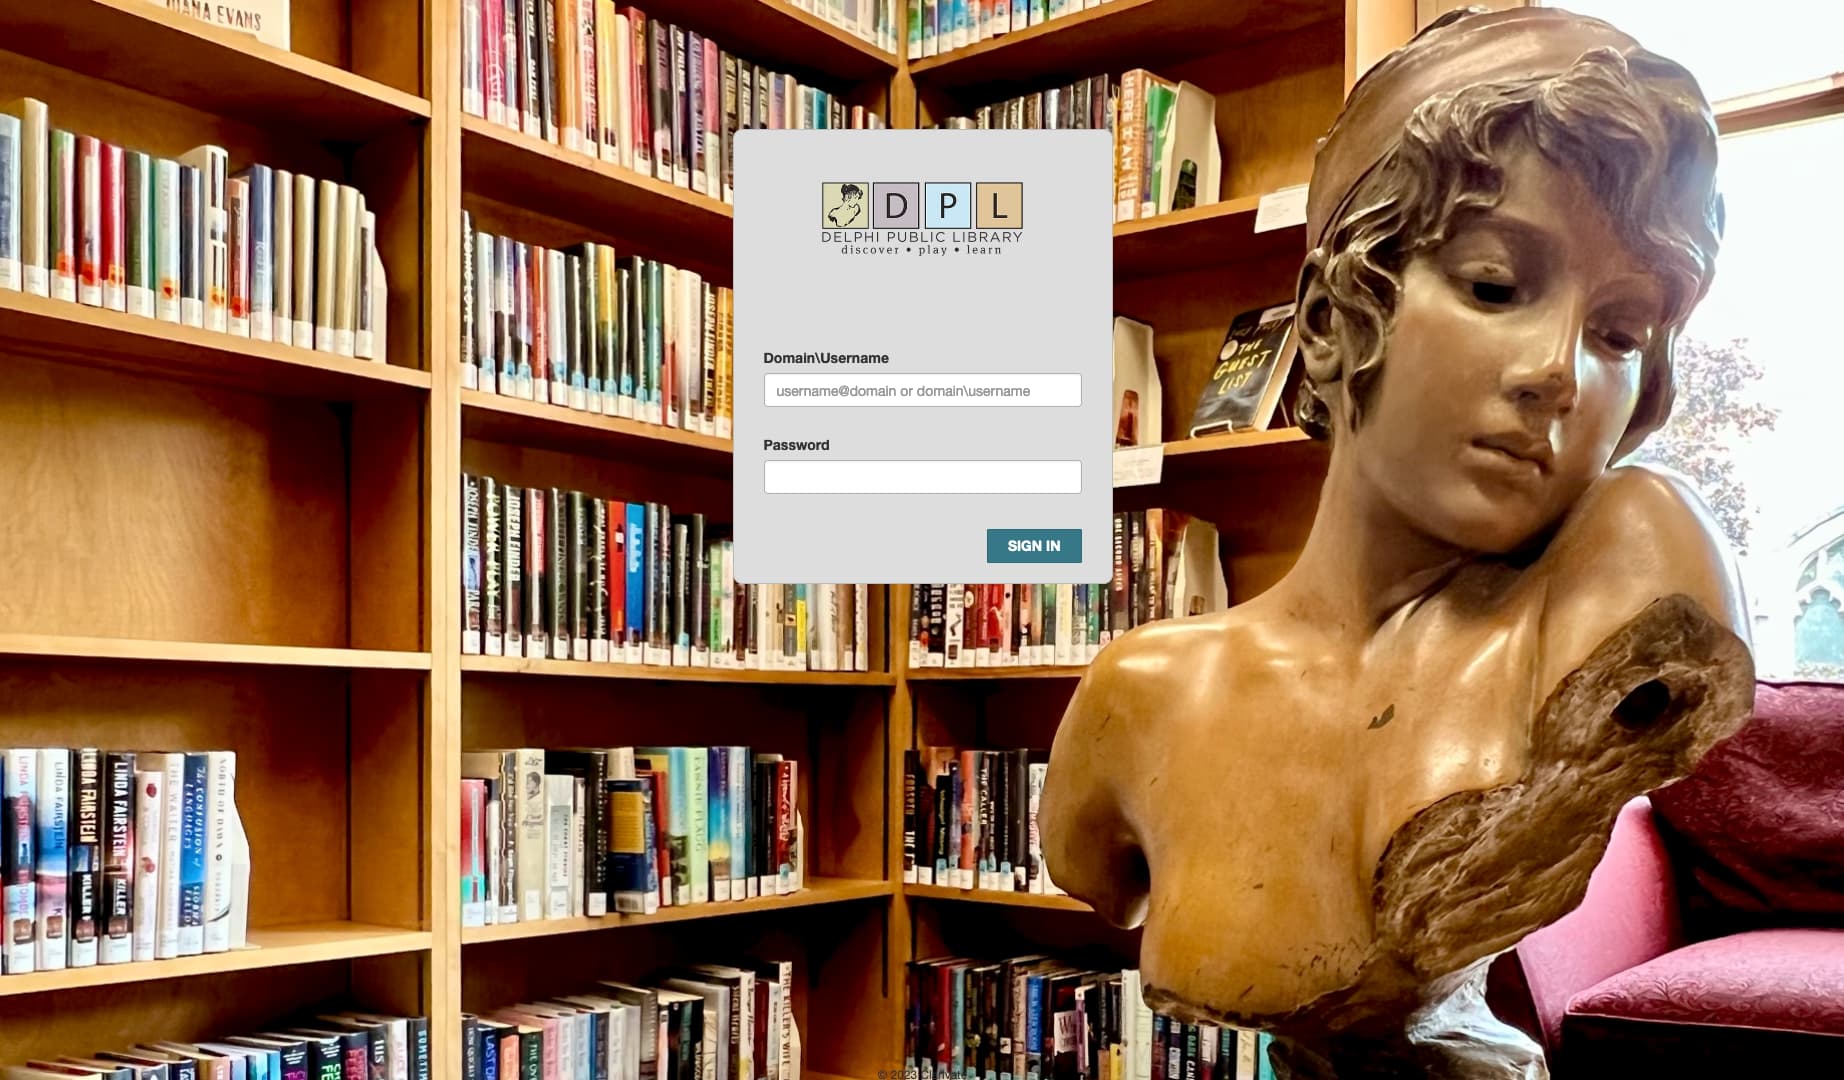
During a session at IUG 2024, someone brought up the idea of customizing the Leap login screen to make it more attractive and utilize the library’s look and feel. You can do this in a few ways, but here’s what I’ve done to create a login screen that looks like what you see below, while not creating a bunch of work for myself later on.
We’re going to do a few things here and all of them will require access to your Leap folder on your server. So if you’re hosted, I’m not one hundred precent sure what you might need to do to make this happen. Contact your Site Manager if you have any questions. If you’re running your own servers, this is a fairly easy process.
We’re going to be doing our work in the following directory on your server:
C:\Program Files\Polaris\YOUR LEAP VERSION\LeapWebApp\wwwroot\staff
Replace YOUR LEAP VERSION with, well… your version of Leap. In this case, I’m working on a 7.4 system so the directory is:
C:\Program Files\Polaris\7.4\LeapWebApp\wwwroot\staff
Change the version number as needed.
The Background Image
The background image is probably the star of this customization and you can make a login screen look amazing with a simple JPG file. You’ll want something that’s at least 1,920 x 1,080 in size, though in this day and age you might want to go with an image that’s 3,840 x 2,160. That’ll handle your 4K and Retina screens on modern workstations. Once you have your image ready:
-
Upload the image to your server and place it in the images folder off your working directory. (See above.)
-
From your working directory, open up the css folder. You’ll find some various .css files in there but, no surprises, we’re going to be interested in login.css.
-
Open login.css in your favourite text/code editor. You’ll see a style specification near the top called .login-body and that’s where we’re going to need to make a change. It’s a good idea to make a copy of your original login.css file just in case something goes sideways. You can make a copy of it right there in the same directory and call it something like login.css.old. Now, in this example, the name of the image I want to use as a background is delphi.jpg. I’m going to add that as a background element and then mark it as a cover. Basically, you can copy and paste the code below and drop it into your css file. You’ll want to change the name of delphi.jpg to whatever the name is for your image file.
.login-body
{
    background-color: #cccccc;
	background: url(../images/delphi.jpg) no-repeat center center fixed;
	-webkit-background-size: cover;
	-moz-background-size: cover;
	-o-background-size: cover;
	background-size: cover;
}
When you save that .css file, you should be able to reload your Leap screen a couple of times and see your new background image.
The Library Logo
This is a simple rename and replace operation. Within Leap, the Leap logo is found in the same images directory you just dropped your background image in. The name of that file is leap_logo_white.png. The original image is 217 x 76 so you’ll want to make sure you resize the image file of your logo to around the same size. You have some leeway when it comes to the size, but the closer you get to 217 x 76, the fewer problems you’ll have.
I renamed the original leap_logo_white.png to original-leap_logo_white.png. Then I dropped my logo image into the images directory and named it leap_logo_white.png. After that, reload your Leap screen a couple of times and the white Leap logo should be replaced by your new logo.
Caveats
This will absolutely break when you upgrade.
I guarantee it.
But… as I said, this is pretty easy to do and, if you squirrel away a copy of your images and that modified login.css file? It’ll take you, I don’t know, maybe five minutes to replace it after the upgrade is over. Just be aware that you will need to put it back after all’s clear on your upgrade!