Abstract
I was recently asked to find a way to gather a specific set of MARC records from a compiled MARC file based upon a list of item barcodes in an Excel spreadsheet. Seeing as how my response to most problems is “Can we put it into a database?” that’s exactly the course of action I pursued. If you have the interest or, goddess forbid you need to do something similar, read on.
Request
We need to extract specific MARC records from a compiled MARC file (.mrc) based upon item barcodes. Within the MARC records, the item barcode is present in the 999 tag, subfield i. There are 25,441 records in the compiled MARC file and we’ll need to extract 1,504 of them. These records need to be recompiled into their own MARC file so they can be imported into the bibliographic records.
Data Files
- KWCLS Compiled MARC.mrc - The compiled MARC file containing the collection of King William County Library System.
- Item Barcodes.xlsx - The list of item barcodes we’ll use to pull the relevant MARC records.
Software Used
- MarcEdit 7.7.30
- micro (A text and code editor)
- Microsoft Excel
- Microsoft SQL Server
- Microsoft SQL Server Management Studio (SSMS)
- OpenRefine
- Python 3
- SQLPro Studio (A SQL IDE)
Process
Beginning with MarcEdit
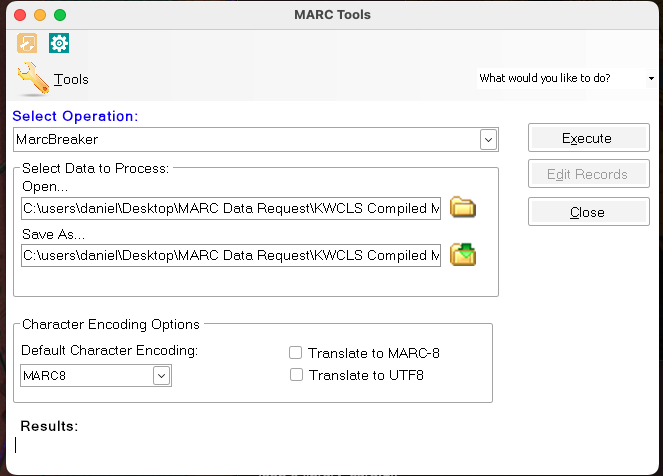
The compiled MARC file (.mrc) isn’t useful to us as is. We’ll nee to convert it into a MARC text file (.mrk) using the MarcBreaker tool in MarcEdit. Open the .mrc file in MarcBreaker and set the save file. Normally I keep the file names the same and save everything to one directory so they’re listed together in the file explorer.
Execute the conversion. Close MarcBreaker after it’s done.
While MarcEdit has the facility to export MARC text files to other formats, I’ve found that it’s difficult if not impossible to make this happen with a large, real world MARC file. There’s always going to be something in the file that isn’t properly formatted or properly validated. Since we’re going to be dealing with dirty data, we’re going to use OpenRefine to handle some of our conversions.
Before that, however, we’ll need to export our MARC text file for OpenRefine use, and MarcEdit will do this without complaining about validation issues.
Open the MarcEditor in MarcEdit and open the .mrk file. From the File menu, select Export for… and choose OpenRefine. Type your file name and run the export. I chose to keep the same file name. After the export completes, you’ll have a JSON file. You can close the MarcEditor and MarcEdit if you like.
Conversions via OpenRefine
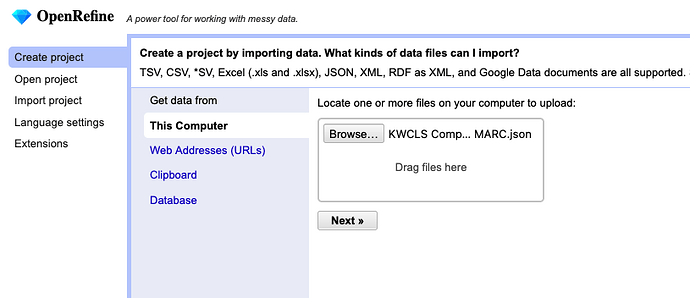
Launch OpenRefine. When it appears in your web browser, click Create project. Browse for and select the JSON file to upload into the system. Click the Next button to continue.
After it loads the initial data, make sure it’s set to parse as JSON files, and that you are set to Preserve empty strings. Click Update preview and you’ll see your JSON data turn into something like MARC data. Click Create project to finalize your import.
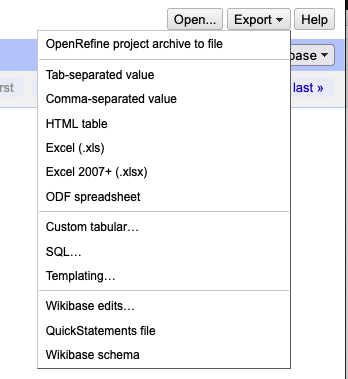
Once OpenRefine creates the project, we’re going to use the Export menu to convert our project into Tab-separated values. OpenRefine will create and export a tab-separated values file (tsv) and deposit it into your default Downloads directory. I recommend moving this file to your working directory in order to keep everything together.
SQL Server Import
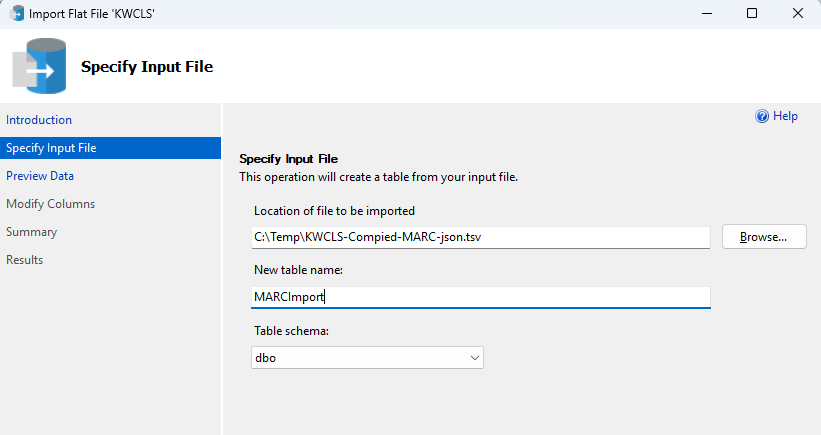
This TSV file will help us create a table in a database so we can get the specific MARC records. I’ll use Microsoft SQL Server for this process. Using SSMS, create a database to receive the import. Since the data is coming from KWCLS, that’s what I named the database. In SSMS, right-click on the database name and select Tasks - Import Flat File. This opens a wizard that will walk you through importing your TSV file. Select the TSV file in the wizard and choose a table name. I called my table MARCImport and left the schema as the default dbo. Click Next.
The wizard previews the data for you and you’ll see your column names aren’t all that friendly for queries. We’ll change those in the next screen, so click Next to continue to Modify Columns.
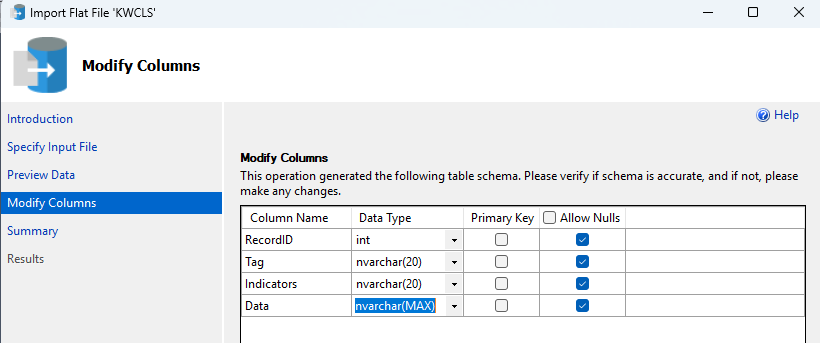
Now you can change your column names. I suggest you set your column names as RecordID, Tag, Indicators, and Data. Modify the data types:
- RecordID - INT
- Tag - NVARCHAR(20)
- Indicatros - NVARCHAR(20)
- Data - NVARCHAR(MAX)
Click Next to continue. The wizard presents a Summary and you can click Finish to complete the import. Click Close after the import completes. Since we’re here, we’ll import the item barcodes as well. While you can import Excel spreadsheets into SQL Server, I’ve had better success dealing with CSV or TSV files. Open up the Item Barcdes.xlsx file in Microsoft Excel. If there isn’t already a header, add one called Barcode. Save the xlsx file as a CSV.
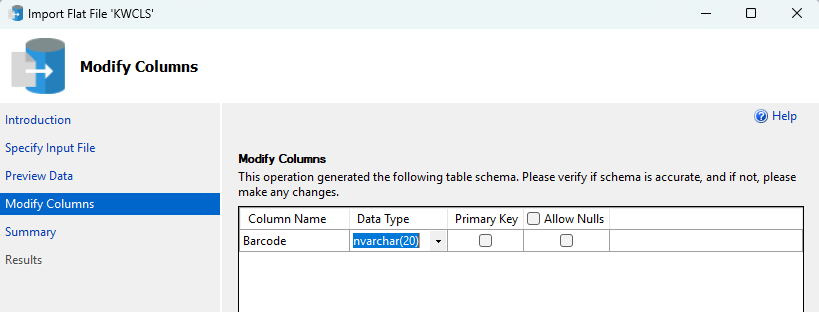
Going back to SSMS we’ll import the CSV into a new table via the same flat file import as before. I called my table ItemBarcodes. When you come to the point where you can modify the column names, leave the column name as Barcode but change the Data Type to NVARCHAR(20). After that, finish the import.
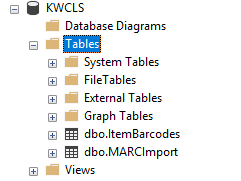
You should now have two tables in your SQL Server database: dbo.ItemBarcodes and dbo.MARCImport. Now we’re ready to query the data in those tables to get the records that we want.
Querying the Data
Once again, we’re after specific MARC records that match the item barcodes. The MARC records have the barcodes in the 999 tag under subfield i. Here’s the query that will get those records:
-- Create a temp table to gather the relevant RecordIDs
CREATE TABLE #TempRecordID (
	RecordID INT
);

-- Populate the temp table
INSERT INTO #TempRecordID
SELECT
	 m.RecordID
FROM
	KWCLS.dbo.MARCImport m
JOIN
	KWCLS.dbo.ItemBarcodes b
	ON (m.Data LIKE '%i' + b.Barcode + '%' )
WHERE
	m.Tag = '999';

-- DATA DELIVERY--
SELECT
	RecordID,
	Tag,
	Indicators,
	Data
FROM
	KWCLS.dbo.MARCImport
WHERE
	RecordID IN (
		SELECT RecordID
		FROM #TempRecordID)
ORDER BY
	RecordID ASC
While I run queries in SQLPro Studio, you can run them in a SQL IDE of your choice. Depending on several factors, like the speed of your database server or the number of records you’re after, this query can take a few minutes to execute. Once the result set is delivered, save it as a CSV. These are the raw MARC records that match your item barcodes.
Massaging the Results
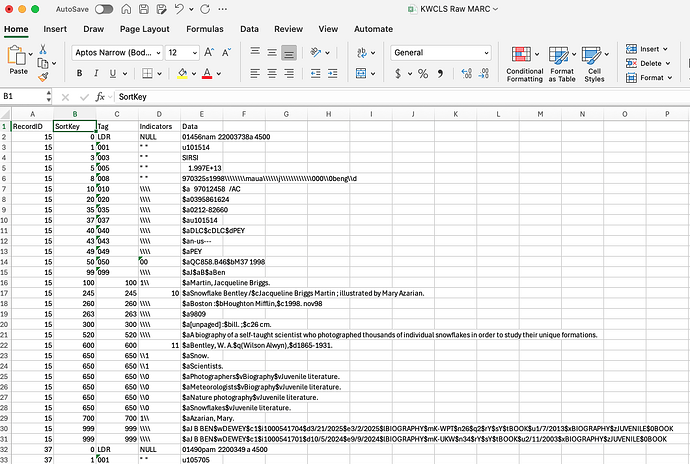
Your result set will need to be sorted before it can be converted back to MARC. And since the LDR tag doesn’t sort properly, we’ll need to do a bit of manipulation in Microsoft Excel. Open the CSV in Excel. You should see column headers like RecordID, Tag, Indicators, and Data. Add a column between RecordID and Tag and give it a header of SortKey. This should be your column B.
In the first row of SortKey, which should be cell B2, enter the following:
=IF(C2="LDR", 0, VALUE(C2))
Double-click on the cell’s drag handle to fill in the entire column with this formula. This will set it so you have a column to key off of for sorting by Tag, and if the Tag happens to be the LDR for a record, then it will put the LDR first where it belongs.
Create a custom sort and sort by RecordID and then by SortKey. Save the file. Now that you have properly sorted MARC data, you can delete the SortKey column all together. Save and close out of Excel.
CSV to MRC via Python
Now that we have raw MARC data, we’ll need to convert it into an actual MARC file. We’ll do this with a Python script. Open up a terminal window and navigate to your working directory. You should see quite a few files there if you’ve been saving everything into that working directory. I initially titled my raw MARC CSV as KWCLS Raw MARC.csv. I’m going to rename it to kwcls.csv for ease of use in the Python script.
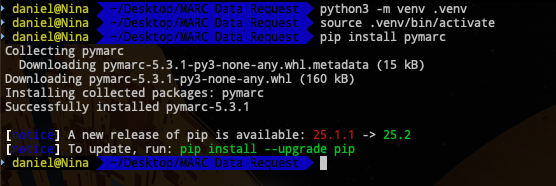
Within your working directory create a venv and activate it.
You’ll likely already have the CSV module installed for Python, but you may not have the module we really need: pymarc. So, let’s install it:
pip install pymarc
Now that pymarc is installed in our venv, we’re ready to run the conversion. Open up micro or your favourite code editor, and paste in the following:
import csv
from pymarc import Record, Field, MARCWriter, Subfield

# Input and output file paths
input_csv = 'kwcls.csv'
output_mrc = 'output.mrc'

# Dictionary to hold grouped MARC fields by RecordID
records = {}

# Open CSV using encoding that handles BOM if present
with open(input_csv, newline='', encoding='utf-8-sig') as csvfile:
    reader = csv.DictReader(csvfile)
    print("Detected headers:", reader.fieldnames)  # Debug info

    for row in reader:
        record_id = row['RecordID'].strip()
        tag = row['Tag'].strip()
        indicators = row['Indicators'].replace('"', '').strip() or '\\\\'
        data = row['Data']

        # Group all fields by RecordID
        records.setdefault(record_id, []).append((tag, indicators, data))

# Write to MRC using pymarc
with open(output_mrc, 'wb') as mrcfile:
    writer = MARCWriter(mrcfile)

    for record_id, fields in records.items():
        rec = Record(force_utf8=True)

        for tag, indicators, data in fields:
            if tag == 'LDR':
                rec.leader = data
                continue

            # Control fields (no indicators or subfields)
            if tag < '010':
                rec.add_field(Field(tag=tag, data=data))
                continue

            # Data fields: handle indicators and subfields
            ind1 = indicators[0] if len(indicators) > 0 else ' '
            ind2 = indicators[1] if len(indicators) > 1 else ' '

            subfields = []
            split_data = data.split('$')
            for part in split_data[1:]:
                if len(part) >= 1:
                    code = part[0]
                    value = part[1:].strip()
                    subfields.append(Subfield(code, value))

            if subfields:
                rec.add_field(Field(tag=tag, indicators=[ind1, ind2], subfields=subfields))

        writer.write(rec)

    writer.close()

print(f"MARC file written to: {output_mrc}")
Make sure you adjust the name of your input file on line five. Save the script as csv2mrc.py and close the editor.
Back in the terminal, execute the script.
python3 csv2mrc.py
If all goes well, you’ll see that a MARC file was written to output.mrc.
Congratulations! This output.mrc is the compiled MARC file of the specific records we were seeking.
